Key Takeaway
Step-by-step guide to setting up Claude AI for UK Shopify sellers in 2026. Covers custom instructions, trade-specific prompts, and Xero integration setup.
The difference between a seller who saves an hour a week with AI and one who saves a day isn’t the tool. It’s that one of them re-explains their business every single morning, and the other set it up once and never has to again.
This is the setup guide for the second kind. By the end you’ll have a configured AI assistant that already knows your products, your tone, your returns policy and your three most common customer questions. You start every task with a tool that turns up knowing the job — not a blank chatbot you have to brief from scratch. No code. About two hours of work, once.
What an AI Worker Actually Is
An AI worker is not a chatbot you talk to. It’s a chatbot you’ve configured: a single, reusable workspace with standing instructions, your business knowledge loaded in, and — when you’re ready — a live connection to your actual tools.
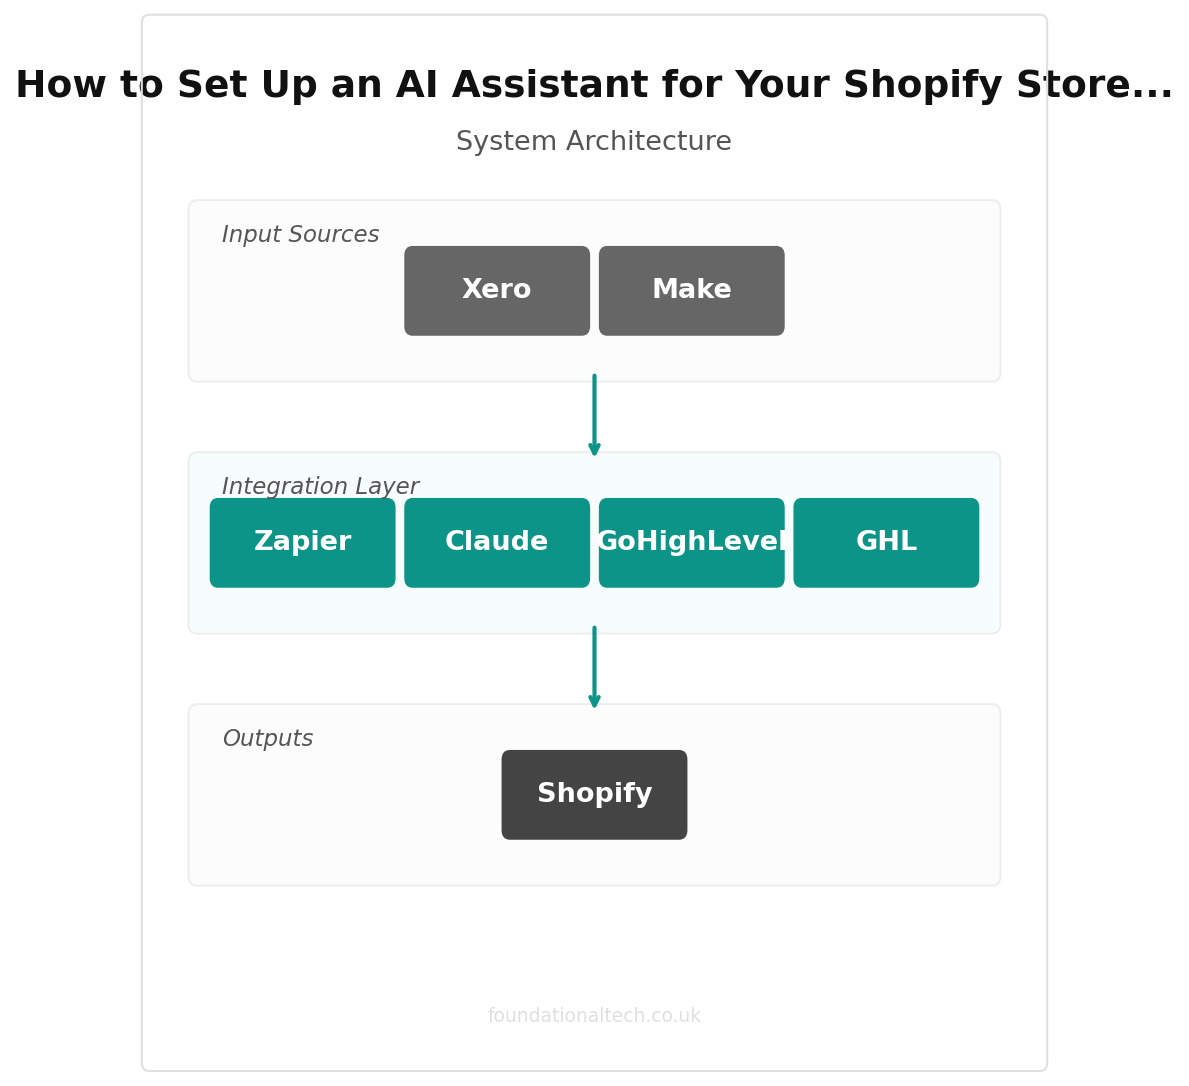
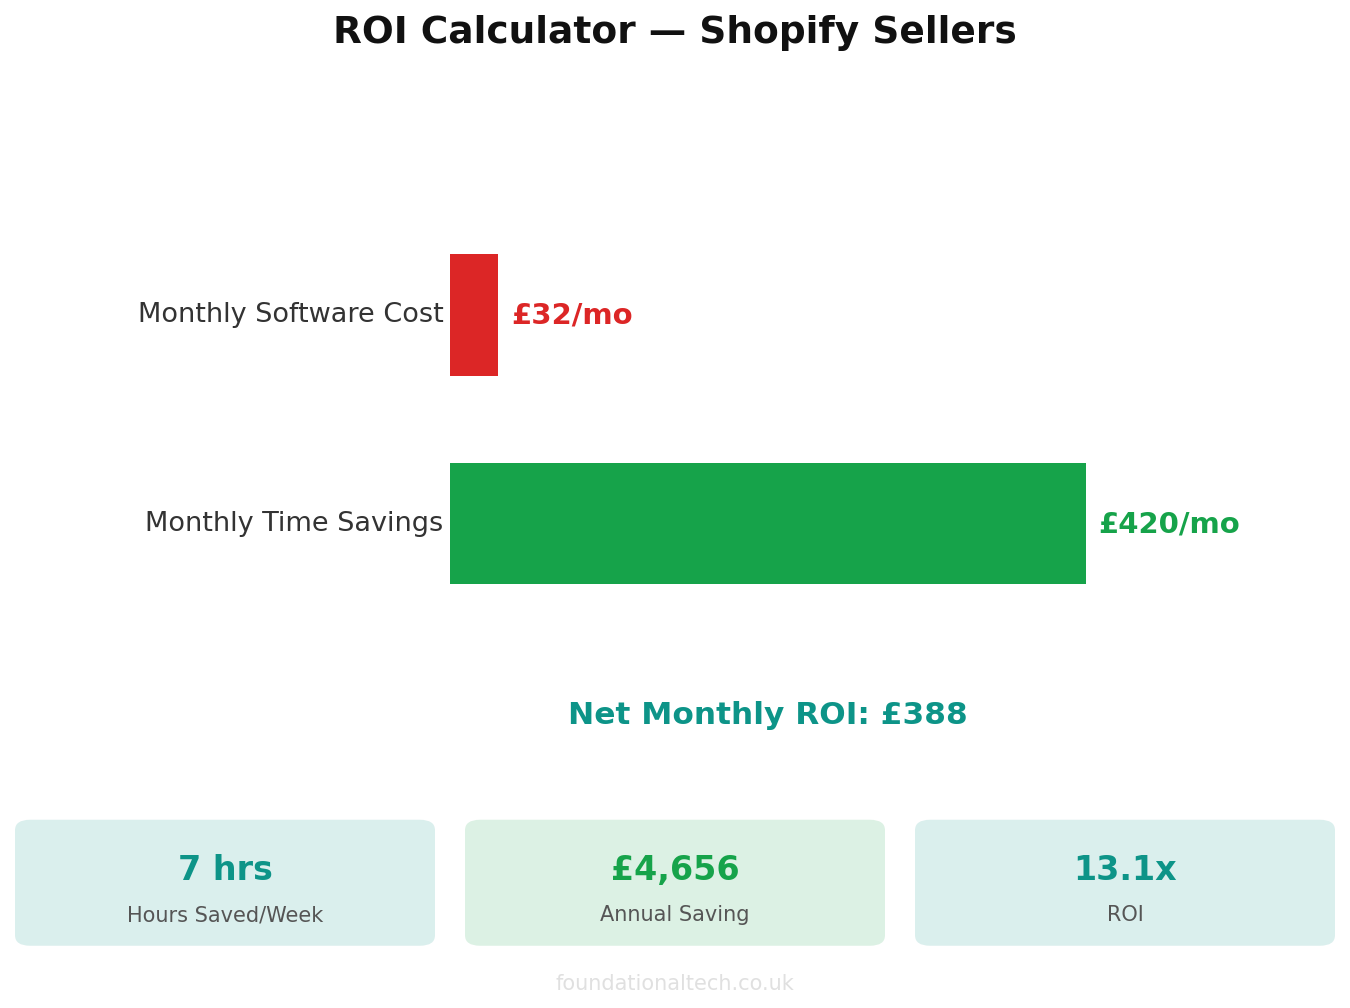
The plain version: a normal chat forgets you the moment you close it. An AI worker remembers. You tell it once that you sell homeware to time-poor parents, that your tone is warm and dry, that you never refund outside 30 days, and that “machine washable at 40°C” is a claim you stand behind. From then on, every reply, description and summary comes out already shaped by those facts. The hour you’d spend re-briefing across a week collapses into the two hours you spend setting it up here.
Step 1: Choose Your Platform
Three realistic options, in plain terms.
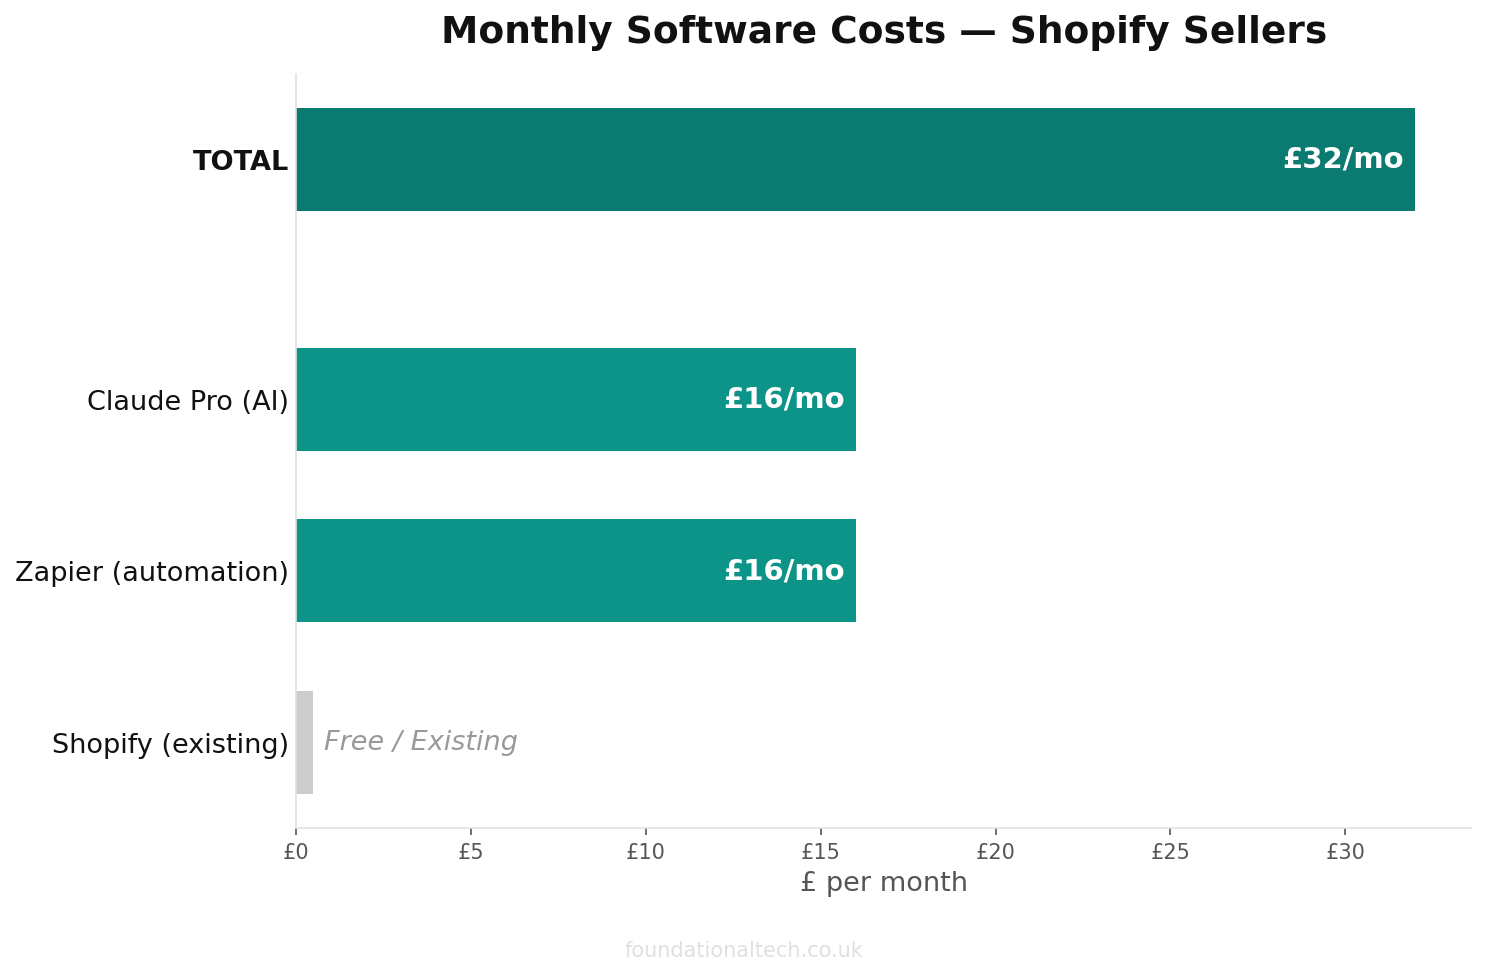
Claude Projects (Anthropic) — the best writer of the three and reliably British in spelling and tone, which matters when it’s drafting customer-facing copy all day. A “Project” is a saved workspace with its own instructions and uploaded files. You’ll want Claude Pro Pro, about £16/month plus VAT (billed at $20), or roughly $17/month on the annual plan. This is the recommendation for most e-commerce sellers, because the bulk of the work is writing and reading, and Claude does both best.
ChatGPT Custom GPTs (OpenAI) — the same idea, called a “Custom GPT”: a saved assistant with your instructions and knowledge files. The strongest ecosystem of extras (images, voice, integrations) if you want them later. Requires ChatGPT Plus, £16/month plus VAT (around £19 all-in).
Gemini Gems (Google) — the natural choice if your business lives in Google Workspace, because it reaches straight into your Gmail, Docs and Sheets. Gemini Advanced runs from about £15.49/month.
Pick one. Don’t run three. The recommendation for a UK Shopify seller is Claude Pro for the writing quality and British defaults; choose ChatGPT if you already pay for it, or Gemini if you live in Google Workspace.
Step 2: Write Your System Prompt
This is the heart of it — the standing instructions your assistant reads before every single task. Paste this into your Project’s / Custom GPT’s instructions box and edit the bracketed parts. (If you built a brand brief from prompt 12 in the last post, drop it straight in here.)
You are the assistant for [STORE NAME], a UK e-commerce business
selling [what you sell] to [who buys it].

VOICE
- Tone: [warm, plain-English, lightly witty — never corporate]
- Spelling: British English, always (colour, organise, -ise endings)
- Length: concise. Customer replies under 90 words unless I say otherwise.

WHAT WE SELL
- [bullet your main categories / bestsellers]

RULES YOU MUST FOLLOW
- Never invent a product claim, spec, price, date or policy. If you
  don't have the fact, leave a [SQUARE BRACKET] for me to fill.
- Never calculate anything that has to be exactly right — VAT, margins,
  reorder quantities, refund totals. Say "check this in [Xero/Shopify]."
- Never promise a refund, discount or delivery date I haven't approved.
- For anything touching customer money or HMRC, draft it and stop —
  I make the decision.

POLICIES (the facts you can rely on)
- Returns: [your policy — e.g. 30 days, unused, customer pays return postage]
- Shipping: [UK delivery times, surcharges, where you do/don't ship]
- Three things we never say: [list them]

DEFAULT FORMAT
- When drafting a customer reply, give me the email only.
- When analysing data I paste, quote the numbers back exactly and
  flag anything unclear as CHECK.
That block is the difference between “generic AI” and “AI that sounds like your shop.” Spend twenty real minutes on it.
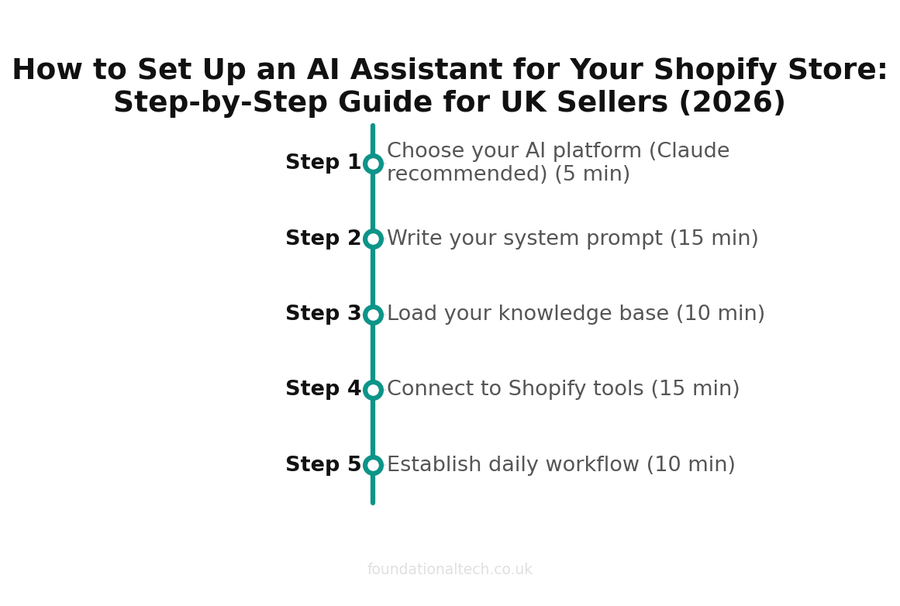
| Step | Action | Time |
|---|---|---|
| 1 | Choose your AI platform (Claude recommended) | 5 min |
| 2 | Write your system prompt | 15 min |
| 3 | Load your knowledge base | 10 min |
| 4 | Connect to Shopify tools | 15 min |
| 5 | Establish daily workflow | 10 min |
Step 3: Load Your Knowledge Base
Instructions tell the assistant how to behave; the knowledge base tells it what’s true about your business. Both Claude Projects and Custom GPTs let you upload files that the assistant can read on every task. Upload:
Your full product list / catalogue (a Shopify CSV export is perfect — it already has titles, descriptions, prices and SKUs).
Your returns, shipping and warranty policies as they appear on your site.
A brand voice / FAQ document — your real answers to your ten most common customer questions, written the way you’d actually say them.
Any supplier or compliance docs you reference often (care labels, certifications, allergen info).
Now when you ask “draft a reply to this customer asking about the blue hoodie’s sizing,” it answers from your size guide, not a guess. Keep these files current — re-upload the catalogue when you do a big range change, and the assistant stays accurate.
Step 4: Connect to Your Tools
This is the step that turns a clever writer into a worker that can reach your live data — and it’s the one to approach carefully. You don’t need it to get value; steps 1–3 already save the hours. Add this when you’re comfortable.
Claude connectors (MCP) let Claude link directly to outside tools and data. Custom connectors are available on Free (one connector), Pro, Max, Team and Enterprise plans, so a Pro subscriber can wire Claude into a supported app and have it read live information rather than waiting for you to paste it.
Zapier or Make are the no-code bridges most sellers actually use, because they connect to almost everything — Shopify, Gmail, Google Sheets, your help desk — without anyone writing code. Zapier’s paid plans start around £16/month (billed annually, plus VAT) for 750 tasks; Make is cheaper for higher volumes, with a Core plan at roughly $9/month (about £7/month) and a free tier of 1,000 credits to learn on. Both can now trigger an AI step inside an automation — for example: new Shopify order tagged “complaint” → AI drafts a reply in your voice → it lands in your drafts folder for approval.
The non-negotiable rule for every connection: the AI drafts, a human sends. Wire it to prepare the reply, the summary, the draft listing — never to send money, issue a refund, or post to a customer unsupervised. Keep a person on every loop that touches someone’s money or your legal obligations.
Step 5: Daily Workflow
Here’s what a configured assistant looks like across a real day.
Morning (10 minutes). Open the Project. Paste overnight customer emails in a batch: “draft replies to each of these in our voice.” Glance, edit, send. Paste yesterday’s reviews or returns: “any new theme I should know about?”
Through the day (as it happens). New awkward complaint? Paste it, ask for three versions, pick one. New product to list? Paste the supplier bullets, get the Shopify description plus the Amazon and eBay variants in one pass. Confusing supplier invoice? Paste it, get a clean table with CHECK flags.
End of day (5 minutes). “Summarise the customer issues I dealt with today and flag anything unresolved.” You close the laptop knowing nothing’s been dropped.
The whole point: because the assistant already holds your voice, policies and catalogue, none of this starts from a blank page or a re-explanation. You’re editing and approving, not originating and briefing. That’s where the hours come back.
5 steps to launch
From zero to a working AI assistant for your Shopify store in under an hour
Start small, then connect
Build steps 1–3 this week — platform, system prompt, knowledge base — and use it for two days before you touch step 4. Most of the value is in those first three steps, and they carry no risk: nothing is connected to anything that can act on your behalf. Once it’s saving you real time on drafting and reading, then add a connector or a Zap, one at a time, always with a human on the send button.
You set it up once. After that, it turns up every morning already knowing the job.
Set up your AI worker this week and reply telling me how it went — specifically, which step took longest and whether the system prompt actually changed the quality of the output. Genuine feedback only; I want to know what works and what doesn’t, and I’ll fold the best setups into a follow-up.
Related guides: If you found this useful, see our guide on How to Create a GoHighLevel Workflow (Step-by-Step Beginner Guide) and A2X vs Link My Books vs Synder: Which Shopify to Xero Integration Fits Your UK Store? (2026 Guide).
A & Y Financial Services configures AI assistants for UK e-commerce businesses and connects them safely to a properly automated bookkeeping stack. That’s what we do.